
Professional PCB manufacturing and assembly
Building 6, Zone 3, Yuekang Road,Bao'an District, Shenzhen, China
+86-13410863085Mon.-Sat.08:00-20:00

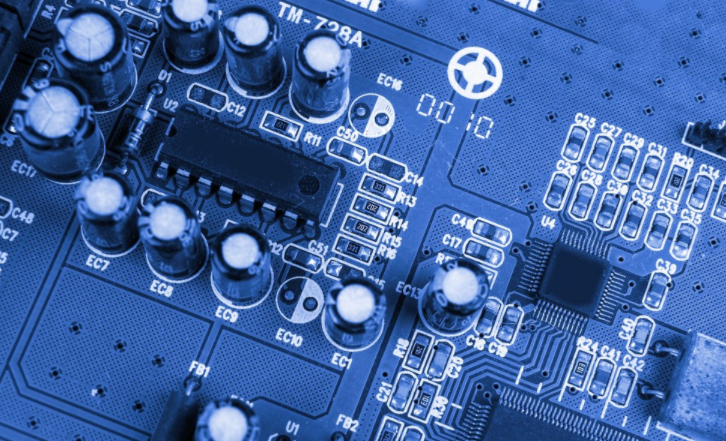
Two Steps of Pre processing for Soldering Components to PCB
PCBA manufacturers have two pre-processing steps, lead forming and component insertion, before welding components to printed circuit boards
1. Purpose of lead forming
When welding plug-in components to the printed circuit board, its wires must be bent to fit the printed circuit board, which is called lead forming
Solder wires on printed circuit boards and insertion components require lead forming. For axial lead components (component leads extend in a straight line from both sides), in order to insert them into the printed circuit board, they must be bent vertically in the same direction. The two conductors must be in the same horizontal plane and parallel. This can not only reduce the thermal shock of lead dipped tin, protect components and circuit boards, but also facilitate the installation of components. Reliable parts (such as transistors) with the same lead direction must also be treated when forming leads, in order to increase the heat conduction distance, increase the thermal resistance, and reduce the thermal expansion and contraction stress caused by the temperature change of the soldering iron when heating during welding, and pay attention to bending and forming at a certain distance from the root of the lead. Do not apply any stress to the root, because such parts become brittle and easy to break due to heat treatment during production.
This wire acts as a connecting wire in the PCB circuit board and can be regarded as a piece. This shall be shaped and cleaned before welding the steel wire. Cut the wire to the appropriate length according to the connection requirements. Please note that the cut wire must be straight and not twisted. After the wire is stripped and tinned, use pointed nose pliers to clamp it 20mm away from the alignment end, and press the wire on the tip with your thumb. The pliers are at right angles. Do not turn the needle nose pliers at this time. At this time, you should pay attention to holding the wire with your thumb, which may cause dirt on the wire. It is recommended to use tweezers or another pair of sharp nose pliers to bend the wire together.
Determine the bonding pad hole to be connected, insert one end of the bent wire into the side hole, test the length of the two holes to be welded, take out the wire, and bend the other end of the wire into a right angle; The wire can also not be inserted into the hole in the middle. The inserted part is bent upward perpendicular to the jack, and the other end is aligned with the hole to be welded on the other side. The wire is directly bent into a right angle.
After the wire is formed, insert the wire into the hole in the pad. When inserting a wire, the lead of the wire should be vertical. If the welding wire is too short or too long, the welding of the welding wire will fail.
After the wires are inserted, welding work needs to be carried out on the other side of the circuit board. If the circuit board is turned over and soldered directly, the wire may fall from the pad hole. Recall that some method needs to be adopted. After the wire is inserted, it can be bent. Clean the wire to prevent it from falling. When bending, pay attention to keeping the sharp nose pliers parallel to the circuit board. Bend the wire to 30 ° of the circuit board. Bend the other side of the wire in the same way. The bending direction should follow the direction of the copper foil of the circuit board and not exceed its edge. In addition, small insulating boards can be used. After the connecting wire is inserted, cover the small insulating board on the connecting surface, and then flip the small insulating board and PCB circuit board to complete the welding. This method is desoldering on PCB. Sometimes there are obvious advantages.
After welding the connecting lines, clean the connecting lines and cut off the excess connections with diagonal pliers The reserved length of the connection shall not exceed the PCB pad, and shall be as flush as possible with the top of the solder joint formed by solder
PCBA manufacturers have two pre-processing steps, lead forming and component insertion, before welding components to printed circuit boards
1. Purpose of lead forming
When welding plug-in components to the printed circuit board, its wires must be bent to fit the printed circuit board, which is called lead forming
Solder wires on printed circuit boards and insertion components require lead forming. For axial lead components (component leads extend in a straight line from both sides), in order to insert them into the printed circuit board, they must be bent vertically in the same direction. The two conductors must be in the same horizontal plane and parallel. This can not only reduce the thermal shock of lead dipped tin, protect components and circuit boards, but also facilitate the installation of components. Reliable parts (such as transistors) with the same lead direction must also be treated when forming leads, in order to increase the heat conduction distance, increase the thermal resistance, and reduce the thermal expansion and contraction stress caused by the temperature change of the soldering iron when heating during welding, and pay attention to bending and forming at a certain distance from the root of the lead. Do not apply any stress to the root, because such parts become brittle and easy to break due to heat treatment during production.

This wire acts as a connecting wire in the PCB circuit board and can be regarded as a piece. This shall be shaped and cleaned before welding the steel wire. Cut the wire to the appropriate length according to the connection requirements. Please note that the cut wire must be straight and not twisted. After the wire is stripped and tinned, use pointed nose pliers to clamp it 20mm away from the alignment end, and press the wire on the tip with your thumb. The pliers are at right angles. Do not turn the needle nose pliers at this time. At this time, you should pay attention to holding the wire with your thumb, which may cause dirt on the wire. It is recommended to use tweezers or another pair of sharp nose pliers to bend the wire together.
Determine the bonding pad hole to be connected, insert one end of the bent wire into the side hole, test the length of the two holes to be welded, take out the wire, and bend the other end of the wire into a right angle; The wire can also not be inserted into the hole in the middle. The inserted part is bent upward perpendicular to the jack, and the other end is aligned with the hole to be welded on the other side. The wire is directly bent into a right angle.
After the wire is formed, insert the wire into the hole in the pad. When inserting a wire, the lead of the wire should be vertical. If the welding wire is too short or too long, the welding of the welding wire will fail.
After the wires are inserted, welding work needs to be carried out on the other side of the circuit board. If the circuit board is turned over and soldered directly, the wire may fall from the pad hole. Recall that some method needs to be adopted. After the wire is inserted, it can be bent. Clean the wire to prevent it from falling. When bending, pay attention to keeping the sharp nose pliers parallel to the circuit board. Bend the wire to 30 ° of the circuit board. Bend the other side of the wire in the same way. The bending direction should follow the direction of the copper foil of the circuit board and not exceed its edge. In addition, small insulating boards can be used. After the connecting wire is inserted, cover the small insulating board on the connecting surface, and then flip the small insulating board and PCB circuit board to complete the welding. This method is desoldering on PCB. Sometimes there are obvious advantages.
After welding the connecting lines, clean the connecting lines and cut off the excess connections with diagonal pliers The reserved length of the connection shall not exceed the PCB pad, and shall be as flush as possible with the top of the solder joint formed by solder


Just upload Gerber files, BOM files and design files, and the KINGFORD team will provide a complete quotation within 24h.