
Professional PCB manufacturing and assembly
Building 6, Zone 3, Yuekang Road,Bao'an District, Shenzhen, China
+86-13410863085Mon.-Sat.08:00-20:00


First, layout precautions
(1) Structural design requirements
Before PCB layout, you need to figure out the structure of the product.
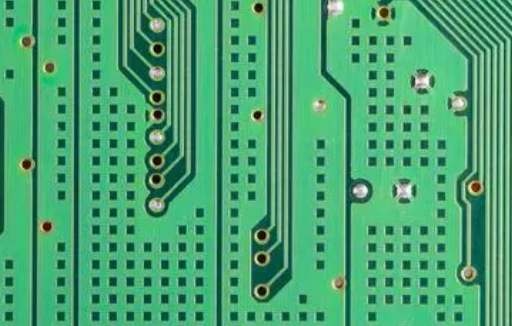
The structure needs to be reflected on the PCB board. For example, the outer thickness of the cavity shell, the thickness of the middle spacer cavity, the chamfering radius and the screw size on the spacer cavity, etc. (in other words, the structural design is specifically designed according to the outline (structure part) drawn on the finished PCB). In general, the thickness of the outer cavity is 4mm; The width of the cavity is 3mm; Dispensing process for 2mm; Chamfer radius 2.5mm. With the bottom left corner of the PCB board as the origin, the compartment should be an integer multiple of grid 0.5, or at least an integer multiple of grid 0.1. This is conducive to structural processors processing, error control is more accurate. Of course, this needs to be designed according to the requirements of the customer.
(2) Layout requirements
Layout Layout is performed first on the RF link and then on other circuits.
A Precautions for RF Link Layout
Completely according to the sequence of the schematic diagram (input to output, including the sequential position of each component and the spacing between components are exquisite. Some components should not be too far apart from each other, such as πnet.) Carry out layout, layout into a "one" shape or "L" shape.
In the actual RF link layout, due to the space constraints of the product, it is impossible to fully implement, which forces us to make the layout a "U" shape. The layout into a U shape is not impossible, but the need to add a spacer in the middle of its left and right isolation, do a good shield.
And then there's the one that needs to be added laterally as well. That is, use a spacer to isolate a zigzag around. This is mainly because the isolation part is very sensitive or easy to interfere with other circuits; In addition, there is another possibility that the gain of the circuit from the input end to the output end is too large, and it also needs to be separated by a spacer (if the gain is too large, the cavity is too large, it may cause self-excitation). .
B Peripheral circuit layout
The layout of the peripheral circuit of the RF device is strictly in accordance with the requirements of the above datasheet, and can be adjusted by space limitation; Digital chip peripheral circuit layout is not much to say.
Two, wiring precautions
According to 50 ohm impedance wire width for wiring, as far as possible from the center of the pad wire, line into a straight line, as far as possible to walk in the surface. Make a 45 degree Angle or arc line at the place where you need to turn. It is recommended to turn on both sides of the capacitor or resistor. If the device routing requirements are met, route the cables strictly according to the reference value length above the datasheet. For example, the wiring length between an amplifier tube and the capacitor (or the wiring length between the inductor) is required, and so on.
In the PCB design, in order to make the high frequency circuit board design more reasonable, better anti-interference performance, should be considered from the following aspects (general practice) :
(1) Reasonable selection of layers
When wiring high frequency circuit board in PCB design, the inner plane in the middle is used as the power and ground layer, which can play a shielding role, effectively reduce the parasitic inductance, shorten the length of signal line, and reduce the cross interference between signals.
(2) Cabling mode
The line must be turned in accordance with 45° Angle or arc, which can reduce the transmission of high-frequency signals and the coupling between each other.
(3) Cable length
The shorter the length of the wires, the shorter the parallel distance between the two wires, the better.
(4) The number of holes
The fewer holes the better.
(5) Direction of interlayer wiring
The wiring direction between layers should be vertical, that is, the top layer is horizontal and the bottom layer is vertical, which can reduce the interference between signals.
(6) Apply copper
Adding grounded copper can reduce the interference between signals.
(7) Parcel the land
The important signal line for ground processing, can significantly improve the anti-interference ability of the signal, of course, can also be the source of interference for ground processing, so that it can not interfere with other signals.

(8) Signal cable
Signal routing cannot be a loop. Instead, route signals in Daisy chain mode.
Three, grounding treatment
(1) The RF link is grounded
The RF part is grounded by multi-point grounding. The copper gap of RF link is usually 30mil to 40mil. Connect ground holes on both sides with the same spacing as possible. Make a grounding hole as close as possible to the grounding pad of the ground capacitor resistance in the radio channel. Ground pads on devices need to be grounded through holes.
(2) cavity shell grounding hole
In order to make better contact between the cavity shell and PCB board. Generally, two rows of ground holes are drilled and placed in staggered mode, as shown in Figure 06. Windows need to be opened on PCB spacer, as shown in Figure 07. PCB bottom grounding copper skin and the bottom plate where the need to open the window treatment, so that it better contact. As shown in Figure 08 (the top half of the PCB board contacts the base) :
(3) Screw placement (structural knowledge required)
For closer contact (better shielding) between the PCB and the base and the cavity shell, screw hole positions need to be placed on the PCB board.
Method of screw placement between PCB and cavity shell: One screw is placed at each cross of the cavity. In the actual design, it is difficult to realize, and can be adjusted appropriately according to the function of module circuit. But either way, there must be screws at all four corners of the shell.
Screw placement method between PCB and base: Screws are required in each small cavity in the cavity shell, depending on the size of the cavity (the larger the cavity, the more screws will be placed). The general rule is to place the screws diagonally across the chamber. Screws must be placed next to the SMA head or other connectors. The PCB board will not be deformed when the SMA head or connector is inserted or removed.


Just upload Gerber files, BOM files and design files, and the KINGFORD team will provide a complete quotation within 24h.