
Professional PCB manufacturing and assembly
Building 6, Zone 3, Yuekang Road,Bao'an District, Shenzhen, China
+86-13410863085Mon.-Sat.08:00-20:00

PCB Maintenance Skill Example Learning Purpose
1 PCB maintenance example
Important:
When the chip pin is short circuited to ground or power, the short-circuit resistance value is 10-25 milliohms.
The resistance of one inch long connecting copper wire is about 40-50 milliohms.
For example, when the 74640 performs an online function test, its pin 6 shows that the ground resistance is 1 ohm, and the ground resistance on the sixth pin measured with QT50 is about 160 milliohms. Suspected short circuit fault caused by other equipment connected to it. After the QT50 inspection, it was found that the chip was connected to the resistor group and the setting switch. The resistance to ground measured at the switch contact is about 40 milliohms, which is lower than the resistance measured at pin 6. This means that the chip shows that the short circuit to ground fault at pin 6 is caused by setting the switch to ground. This is not a failure of the chip itself.
Under normal conditions, there is no (or little) grounding and power supply for the pins of busbar equipment in the design. If the pin is grounded or powered, test the device again.
When there is no good circuit board for reference and comparison, the bad circuit board can also be repaired by analyzing the pin state and the actual measured waveform. For example, many chips only use some logic units in the circuit design, and the input pins of the rest unused parts are usually grounded to prevent this part from being in the random operation state and causing interference to the circuit. Analyzing the actual output waveform according to the logic function of the chip will help determine whether the tested chip is really damaged.
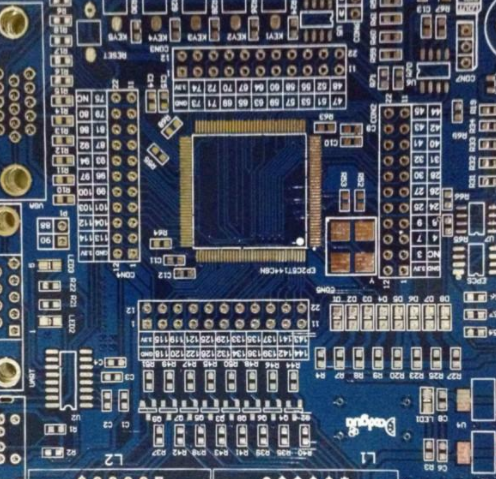
Circuit board

Example 1: 74123 (monostable resonator) pin floating (FLT)
In the online function test, the input pin of the device usually displays a high impedance state (the resistance value is greater than 1 megohm). When the device is tested offline, this result will appear if the TTL or CMOS load is not connected. In online testing, the input pin of a chip is usually connected to the output pin of another chip. To ensure that the output pin of the chip drives the fan out load, it is usually low impedance.
In the online test, if the input pin displays "FLT" in the pin status window, it means that the pin is in the floating state, and the pin can be connected to the boundary connector of the circuit board or 3-state device, or to the PCB Open circuit
By comparing with the status of other input pins, you can determine whether the status of this pin is normal.
In this example, the sixth pin is connected to the input terminal of the RC circuit. The capacitor in the circuit is charged through the resistor and then discharged through the sixth pin of the chip. Then, the input pin cannot be in the high impedance state, because if it is high impedance, the capacitor cannot be discharged. A test error occurred while executing ICFT on the chip. The seventh pin shows "FLT", and the other same input pin (pin 15) shows normal logic level (impedance to ground is about 550 ohms). Although the test result of the QT200 on the chip is "test failed", the output pin of the chip turns over, which seems to be a timing problem. If the user does not pay attention, the test results will be ignored and considered as a matter of time.
The above analysis shows that the user carefully observes and analyzes the pin status information, which is crucial to determine the real fault point. If the input impedance of the input pin is 550 ohms, it will not be in the floating state (FLT). The actual cause of the failure in this example is that the monostable resonator cannot discharge normally due to its damaged function.
Similarly, the output pin of the device cannot be in the floating state (FLT), because if it is in the floating state, the pin cannot absorb or discharge current, nor can it drive any fan out load. In addition, users should also note that the impedance of any node to ground should not be less than 5-10 ohms (unless the node is indeed short circuited to ground, the impedance at this time is about 2 ohms). In the low logic state, the impedance of common buffer drivers is about 15-17 ohms.
Example 2: Due to poor contact, the power clamp of the tester cannot provide test power
When power is supplied to the board under test through the power supply clamp of the tester and the chip on the board under test, it is sometimes found that the measurement voltage of the power supply pin of the chip under test is only 4.5V, and the test results are often unstable. The reason for this may be that the chip pin is oxidized, which makes the power supply clamp of the tester unable to contact the chip pin well. When this problem occurs, users can take different methods to solve it. The most effective method is to connect the power terminal of the tester to the power cable of the tester through the boundary of the board under test.
Example 3: When the board under test is powered on, a pin of the chip is short circuited to the ground
This phenomenon is difficult to solve. The test results show that the impedance of the output pin of the tested chip is 10 ohms (low impedance state), and there is no flip action. When its logic is low, the impedance is less than the impedance of the normal buffer driver output pin. When disconnecting the power supply of the test board, use 3 meters to measure whether the pin is short to ground (the resistance is greater than 1 kiloohm).
This short circuit only occurs when the board under test is powered on, which may be the cause of the output terminal of the equipment under test or the input terminal of the equipment connected to the output terminal. When the logic is low, the output terminal of the device under test should be able to absorb current; when the logic is high, it outputs current to the input pin of the fan out device.
Example 4: When the board under test is not powered on, one pin of the three chips is short circuited to ground
If the tested equipment is short circuited to the ground internally when it is powered on, the measurement will not be short circuited to the ground when it is not powered on. In this case, a milliohmmeter can be used to measure the resistance to ground of the output pin of the device under test and the resistance to ground of the input pin of the connected fan out device. The measuring point with the lowest resistance is actually damaged equipment.
The specific phenomenon is that during ICFT, three chips on the test board appear "test failure", and the second pin of bus bar device 74374, the 18th pin of 74244 and other 74244 pins are displayed in the pin status window. Pin 3 is short circuited to ground respectively.
First, find the chip closest to the PCB short-circuit point. When using the QT50 short circuit tracker for testing, set the measuring range to 200 milliohms, measure the resistance of the short circuit pin of the three chips to the ground, and find the pin with the lowest resistance. The method is: connect one probe to the power grounding of the board under test, connect the other probe to the second pin of the 74374, measure the resistance of 160 milliohms, then connect to the 18th pin of the 74244, measure the resistance of 90 milliohms, and then connect to the third pin of the other 74244, measure the resistance of 10 milliohms. Then this pin is the short circuit point that causes the bus bar error.
The following question is to determine whether the real short-circuit point is in 74244 or on the PCB short-circuit pin of the copper wire connected to the outside of the circuit breaker The method is: use one QT50 probe to ground, connect the other probe to the top of the solder joint of the third pin of the 74,244, read the resistance of this pin to ground (about 10 milliohms), then connect the probe pen to the connecting copper wire 3-4 mm outside the solder joint of the third pin, and then read the resistance value of the third pin to the ground at this time (about 6 milliohms) The result shows that the real short circuit point is the external copper wire connected to pin 3


Just upload Gerber files, BOM files and design files, and the KINGFORD team will provide a complete quotation within 24h.