
Professional PCB manufacturing and assembly
Building 6, Zone 3, Yuekang Road,Bao'an District, Shenzhen, China
+86-13410863085Mon.-Sat.08:00-20:00

PCB designtechnology of king ford
1. Set the software working environment
Software rule setting:
Enter the design rules and set the items in the options according to the design requirements:
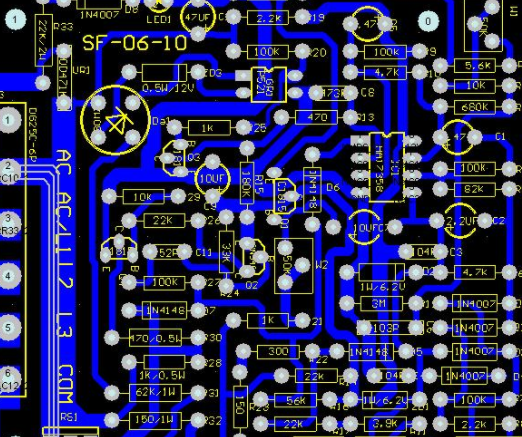
1. Safety distance setting: The clearance constraint of wiring in PROTEL99SE software specifies the distance that must be kept between wiring, pads, through-hole, etc. of different networks on the board. In the design of single panel and double panel, the preferred value is 10-12mil; The preferred value of a printed circuit board with four or more layers is 6-8 mil; The maximum safe distance is usually unlimited.
2. Wiring layer and direction setting: the wiring layer of wiring, setting the used wiring layer and the wiring direction of each layer (only the top layer is used for wiring boards, and only the bottom layer is used for directly inserting boards). Presets are usually used.
3. Setting of through-hole option: The wiring through-hole style in PROTEL99SE software specifies the minimum, maximum and preferred values of through-hole ID and OD. The through hole outer diameter of single panel and double panel shall be set between 40 mils and 60 mils; The inner diameter shall be set at 20mil-30mil. Four or more layers of printed circuit boards shall have a minimum outer diameter of 20 mils and a maximum outer diameter of 40 mils; The minimum inner diameter is 10mil, and the maximum inner diameter is 20mil.
4. Line width option setting: The wiring width constraint in PROTEL99SE software specifies the wiring width. The wiring width of single panel and double panel shall be set between 10-30mil. Under special circumstances, the maximum value shall not exceed 60 mil and the minimum value shall not be less than 8 mil; The minimum value of 4-layer or multi-layer printed circuit board shall not be less than 5mil, and other settings shall refer to the settings of double-sided board. You can also add line width settings for some networks, such as ground wire,+5V power line, clock line,+12V power line, - 12V power line, AC power input line, power output line, etc. The preferred value of various power lines is generally 40ml (the maximum value is unlimited, and the minimum value is 8mil. If you can connect, the line should be as wide as possible). Determine the maximum line width according to the relationship between the line width of the printed circuit board and the current (about 500 mA current is allowed per millimeter line width).

5. Copper coating connection option setting: The manufacturing polygon connection style item in PROTEL99SE software specifies the copper coating connection method. Set Rule Content to Release Connection mode, Conductor Width to 25mil, Wires to 4, and Angle to 90 degrees.
6. Physical aperture setting: the constraint item of hole size manufactured in PROTEL software specifies the size of physical aperture. The minimum value is set as 20mil, and the maximum value is unlimited (Note: the physical holes usually specify bit holes, installation holes, etc.). Other items can usually use their preset values.
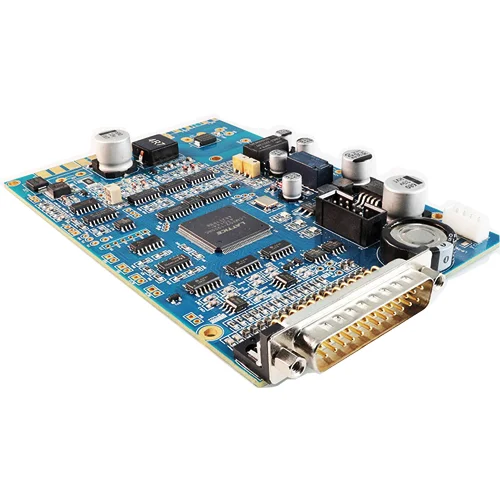
PROTEL99SE PCB design
PROTEL99SE PCB software parameter setting:
Enter Design Options and Tools Preferences, and set the items in the options according to the design requirements:
1. Visual mesh option setting: select from the design option layer in PROTEL software: the top solver in the mask; Screen printed blouse; Prohibited and multi-layer in other; Select all items below the system. The Visible Mesh item specifies the size of the visible mesh, which is set to 10mil (upper) and 100mil (lower) respectively.
2. Snap and device moving grid option settings: The "Design Option Options" item in PROTEL software specifies the size of snap and device motion grids, and the snap and device motion grids are both set to 10mil. Select "Grid" and set "Range" to 8mil, "Visible Type" to "Line", and "Measurement Organization" to imperial system.
DRC verification settings:
1. Enter Tools, Design Rule Check, and set options according to design requirements: Clear Constraint, Max/Min Width Constraint, Short Circuit Constraint, and Unrouted Network Constraint of report routing rules are all selected; Select the maximum/minimum hole size of the report manufacturing rule; Select all options of report options; Select Wire Routing Rules Clear Constraint; Select layer pairs of online manufacturing rules; On the online Placement Rule, select Component Gap.
2. Add a device library
This step is mainly to call out the components displayed in the schematic diagram of the printed circuit board from the corresponding component library
3. Import network table
During the process of importing network tables, you must ensure that there are no errors. It is strictly prohibited to design when there is an error in the network table import. (This operation must be noted) Determine the size of the printed circuit board and the location and size of the positioning hole, and lock the relevant components
4. Layout of components
The principle of PCB layout is beautiful and generous, with proper density, in line with electrical characteristics, conducive to wiring, and divided into modules as far as possible. If possible, place the components in order and try to ensure the symmetry between the main components and modules.
Requirements: The layout of the entire printed circuit board should be large, with proper spacing, and should not be too tight or loose in some places. Wire mesh frames shall be minimized and modules shall be highlighted. The Chinese or English signs of the module shall be placed in a symmetrical and parallel position as far as possible, and can reflect the name and aesthetic feeling of the module.
After the layout is completed, the printed circuit board layout should be checked. In general, the following aspects should be checked:
(1) The size of the printed board shall be consistent with the size of the processing drawing, and there shall be positioning marks and reference points;
(2) Components shall ensure that there is no conflict between 2D and 3D space;
(3) The layout of components shall be tight and orderly;
(4) Parts that need to be replaced frequently shall be easy to replace;
(5) Proper distance shall be kept between the heating element and the heating element. If heat dissipation is required, a radiator shall be installed to ensure smooth airflow;
(6) Adjustable parts shall be easy to adjust;
(7) The signal flow shall be smooth and the interconnection shall be the shortest;
(8) Ensure as few through holes as possible;
(9) Do not use Ctrl+X or Ctrl+Y to flip the device;
(10) The inner diameter of holes on a PCB cannot exceed 9 types;
(11) Components that affect the appearance, such as TO-220 packaged three terminal voltage regulator and chip electrolytic capacitor, should be welded on the back as far as possible; Potentiometers, middle circumference and adjustable capacitors that do not need to be adjusted shall be welded on the back as much as possible, and shall not be welded through printed circuit boards, and shall be clearly stated in the product specification; Other components that particularly affect the overall appearance, such as large electrolytic capacitors and relays, should be welded on the back.
PCB wiring
It is generally recommended to adopt the method of automatic wiring+manual adjustment. Automatic wiring shall be conducted in the sequence of ground wire power wire clock wire other. Set the routing priority in the routing rules. 0 is the lowest level, 100 is the highest level, a total of 101 cases. In more complex circuit boards, considering the requirements of power characteristics, interference and other factors, we use manual wiring. It is prohibited to place through holes on the pins of components, and the laid wires should be locked before automatic wiring. The aesthetic and electrical characteristics shall be considered when wiring. If routing has a special effect on the appearance, try going the opposite way. In principle, do not wire on the front of the product name, model and logo (except under special circumstances), or between the screen box and the prohibited box.
Anti static Methods in PCB Design
Nov 03,2022

Just upload Gerber files, BOM files and design files, and the KINGFORD team will provide a complete quotation within 24h.