
Professional PCB manufacturing and assembly
Building 6, Zone 3, Yuekang Road,Bao'an District, Shenzhen, China
+86-13410863085Mon.-Sat.08:00-20:00

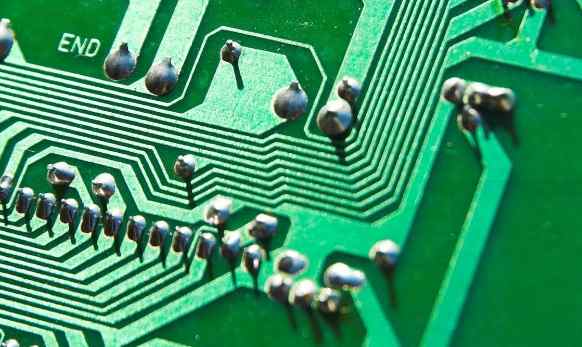
The GIF animation below shows the manufacturing steps of a typical two-sided flexible circuit board.
An animated GIF shows the manufacturing process of a flexible circuit board.
1, adhesive or kind of "seed" application
The use of epoxy or acrylic adhesives, or sputtering is the key to creating a thin copper coating.
2. Add copper foil
RA/ED copper foil layer is pressed onto the adhesive (this is the prevailing method) or chemical plating is used.
3. Drilling
Through holes and pad holes are usually drilled mechanically. Multiple flexible plates can be drilled simultaneously through a working rotary table. Using the same method as with hard plates, precutting of flexible plates can be performed in conjunction with drilling, which requires more careful recording, but with reduced alignment accuracy. Laser drilling is typically used to deal with ultra-small holes, which can greatly increase the cost because each film needs to be drilled separately. Excimer (UV) or YAG (infrared) is used to handle high precision boreholes (microvias) and CO2 lasers are used to drill medium sized boreholes (4 mil +). Large through-holes and plate shears can be handled using the stamping method, but that is another processing step.
4. Through hole electroplating
Once the holes are drilled, copper is added to the holes using the same process of deposition and chemical plating as with hard plates.
5, printing anti-etching ink
The surface of the film is coated with a photosensitive resist and then exposed with the desired pattern to remove the unwanted resist before chemically etching the copper.
6. Etching and stripping
After the exposed copper is etched away, the resist is chemically removed.
7. Covering film
8. The top and bottom of the flexible plate are protected by the cutting forming covering film. Sometimes the flexible plate needs to be soldered on some components, so the covering film plays the role of welding resistance layer. The most common covering material is polyimide, which is bonded using an adhesive, and a glue-free process can also be used here. In the glue-free process, the photoresistive flux is brushed on the flexible plate, which is the same process as the hard plate. To reduce costs, screen printing can be used and then cured by ultraviolet light.
Flexible circuit with covering film - Note that the opening in the covering is generally smaller than the component pad.
One thing to note about the protective film is that it is usually only placed on a portion of the exposed flexible circuit. For hard and soft bonded plates, the protective film will not be placed on hard plates unless there is a small overlap - usually about half a millimeter. Of course, the protective film can include the whole hard part, but doing so will not be conducive to the adhesion of the hard plate and the stability of the z axis. This optional cover is called a "bikini cover" because it only covers the bare part. In addition, the covering film leaves notches in the component or connector pad to preserve at least two sides of the pad. We'll explore this in our next blog.

8, flexible plate shear
The final step in making a flexible circuit is shearing. This is often referred to as "blanking". The high yield, low cost shear method is the use of hydraulic punch and steel die. Although costly steel molds are required, this method can cut out many flexible circuit boards at the same time. For prototype and small batch production generally use knife die. The long blade is molded to the outline shape of the flexible circuit board and attached to the die base (MDF, plywood or thick plastic such as Teflon). Press the knife mold, you can cut the flexible circuit into shape. For smaller prototypes, X/Y cutters can be used, similar to those used for vinyl signage.
Pressing and cutting
If the flexible circuit board also has to be pressed with the hard board into a soft - hard binding board (the part we're interested in), then I'll move on. We need to press the flexible plate and the hard plate together. Like normal flexible plates, it requires independent drilling, plating and etching. The difference is that it is thinner and more flexible because of the lack of glass fiber. As mentioned earlier, less elastic boards can be manufactured on demand using PI and fiberglass. Finally, it should also be used as a sandwich and hard plate pressed together, and made into a Mosaic board.
Laminated lamination
Flexible circuit boards are hot pressed together with hard circuit boards and other flexible boards through adhesives. Each flexible plate is not adjacent to each other. To maintain flexibility, each flexible plate has a maximum of 2 copper skins. The flexible plates are separated by rigid semi-curable sheets, substrates, or PI core bonding sheets made of epoxy resin or acrylic adhesives.
Essentially, each hard plate is cut separately in the part filled by the flexible plate.
Below is the process of laminating the soft and hard bonded plates. Two two-layer flexible circuits are embedded in three hard plates. The cascading structure is shown in Figures 3 and 4.
Figure 3: Metal etching, plating, protective film and blank flexible plate combined with glass epoxy rigid plate.


Just upload Gerber files, BOM files and design files, and the KINGFORD team will provide a complete quotation within 24h.