
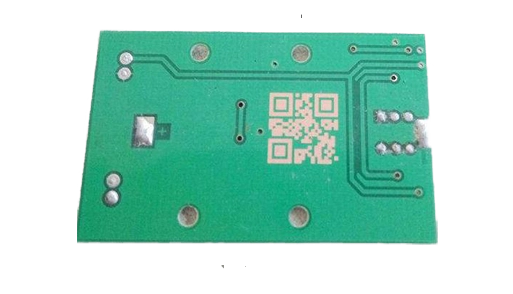
Professional PCB manufacturing and assembly
Building 6, Zone 3, Yuekang Road,Bao'an District, Shenzhen, China
+86-13410863085Mon.-Sat.08:00-20:00

In the printed PCB, after setting the circuit board contour, call the part (floor area) to the work area. Then reposition the parts to the correct position and wire them after completion.
Component placement is the first step of this work, which is very important for the smooth routing work later. If the module is insufficient during the wiring work, the parts must be moved, and the completed wiring diagram must be stripped and restarted.
In addition to many parts that must be placed during part placement, a high degree of perfection is required. Therefore, this time, we will introduce the component placement methods and useful functions to effectively perform this troublesome task.
Circuit board design
Optimized schematic layout - placement of reflector components in the schematic
When arranging parts on the backplane, it is necessary to rely on the screen puller to find the shortest position for wiring. However, the parts of long network lines such as power supply and bus cannot be judged by the screen puller alone, but must refer to the circuit diagram. Therefore, when drawing a circuit diagram, components that want to be close to each other on the circuit diagram should also be close to each other. If the bypass capacitors are drawn together, the circuit diagram will be very smooth, but the problem should be drawn near the power supply pin as the object.
For RF and other analog circuits that must pay attention to signal attenuation and noise, please read the layout requirements of the schematic diagram. In this case, creating a schematic symbol with the same pigtail as the pin will make it more relevant and easier to understand. This is similar to the idea of a physical wiring diagram that is often used during analog spikes
1. Schematic diagram optimized for circuit board design and component placement on the circuit board The creation of schematic symbol shape of 32 pin IC (which is the main component) is similar to the actual shape. Because the bypass capacitor should be placed near the power supply pin, it should be placed near the power supply pin on the schematic diagram.
Similarly, the circuit diagram should not be divided into different functional blocks on a piece of paper, but should be divided into paper for each functional block. If you want to use the same circuit repeatedly, please use drawing symbols, equipment drawings and multi-channel design to copy the circuit instead of simple copy and paste. This allows you to use the module functionality effectively.
Using Modules
When data is transferred to a PCB using "Update PCB Document...", the footprint is called up and the connection between the thickest terminals is displayed. A square box is displayed on the back. This square box is a module, and parts are grouped into each schematic drawing. Since you can use this module to move groups, it is best to use this module to roughly arrange the layout.
2. For the layout grouped by modules, the schematic diagram consists of a parent schematic diagram and two child schematic diagrams, three in total. The parent schematic has two worksheet symbols, representing the power circuit and the sub schematic. Use "Update PCB Document..." to transfer data from this schematic to PCB, create a space for each of the three sheets, and group the footprint by schematic sheet. Each function block can be roughly positioned by moving the module.
3. Complete the placement of PCB components. Move the components (footprints) separately to place them in the correct position. This figure shows the complete layout. Parts are grouped by function block, so you can easily select the required parts. Similarly, although the same circuits are listed on the two channels, there is no need to worry about confusion because they are separated in the module.
In addition, this module function is particularly useful when fixing the basic layout and repeating many circuits, such as in a mixer.
The following is an example of an audio mixer with a multi-channel PCB design. The position of the parts placed on the mixer board almost depends on the product specification. Therefore, the work efficiency can be greatly improved by using modules to assign parts to designated areas.
4. The Audio Mixer parent diagram provides a child diagram for each function block, with seven worksheet symbols indicating them. However, due to the multi-channel design, the number of modules is actually equal to 15. If you transfer data from here to the PCB, 15 modules are created.
5. Place the module in the defined position in the mixer. The position of the function block is determined by the product specification. Place the module in the designated area. This figure shows the PCB layout of all modules. The part is deleted once.
6. Assigning PCB parts to modules Transfer data from schematic will call parts. Assign them in each module through the [Tool] - [Component Placement] - [Align in Module] command.
7. Reposition the parts in the module by rearranging the parts assigned to each module. No trouble, because you just need to select the parts in the module and move them in the module. Don't confuse it with other channels.
Commands for using modules
If you leave the default settings, the module is automatically created when the circuit data is read into the PCB. Then, make rough positioning when moving or rotating. You can use the mouse drag or shortcut keys to do this, just like placing individual footprints. In addition, the module has its own editing commands in [Design] - [Module]. In addition, commands such as [Tools] - [Component Placement] - [Align in Module] commands are prepared to place and route each module.
Using shortcuts and cross probes
PCB part placement is to move the part repeatedly with the mouse and use the [SPACE] key to rotate the part. Almost all of these operations will complete the placement, but you can use the shortcut keys to work faster. For example, if you want to select a specific part, you can use the shortcut keys [J] - [C] to move the cursor to the coordinates of the part. You can also use [J] - [L] to move the cursor to the specified coordinate value. Then, after starting the [Edit] - [Move] - [Component] command, execute [J] - [C] and [J] - [L] repeatedly through keyboard operation to place parts. I can. This method is particularly useful when you have a large number of component locations. In addition, the cross probe function is useful when arranging PCB components with reference to the schematic diagram.


Just upload Gerber files, BOM files and design files, and the KINGFORD team will provide a complete quotation within 24h.